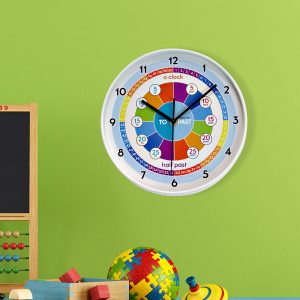

- STICKER CLOCK
- DIY CLOCK
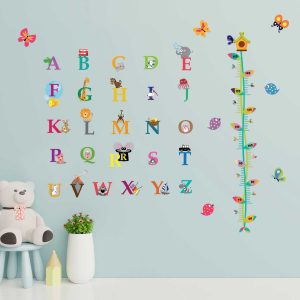
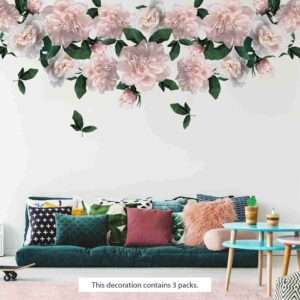
- WALL STICKERS
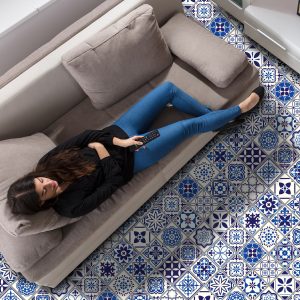
- WALL TILES
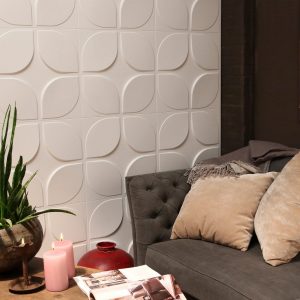
- WALL 3D TILES
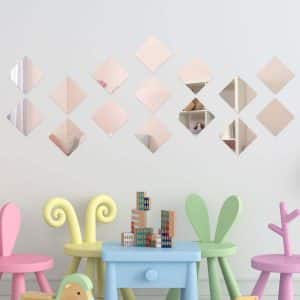
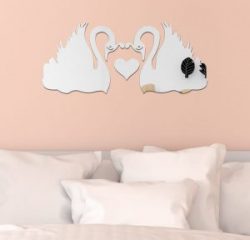
- ACRYLIC MIRRORS
- CUCKOO CLOCK
- PHOTO FRAME STICKERS
- 3D BUTTERFLIES
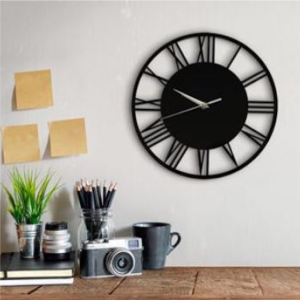
- WALL MIRRORS AND CLOCKS
- WALL MURAL
- DOOR MURAL

Step 1
Choose the space where you’d like to place the clock and attach a hanger to the wall by using a hammer. (You can refer to the size of the clock on the clock images inside)

Step 2
Place the auxiliary scale on the wall. Start applying the stickers on the top, bottom, left and right tips, using the scale to determine these points. (You can refer to the radius (r) of the clock in order to align the stickers and the scale)

Step 3
Apply the rest of the stickers on the wall accordingly. Refer to the images of the clocks or get creative & make your own unique composition.

Step 4
Adjust the clock mechanism to the correct time and insert the battery.

Step 5
Hang the clock on the wall and enjoy your new Sticker Clock!


Step 1
Plan the location of the clock. Fix the provided hanger to the wall by using a hammer or a heavy object.

Step 2
Cover the clock with auxiliary scale, using the scale and hanger as centre point, to position the acrylic hour and minute ornaments on the wall by peeling the double-sided tapes.

Step 3
Assemble the clock mechanism by fixing clock hands carefully. Press the clock hands gently with both hands into the centre of the clock mechanism and aim them at 12 o’clock.

Step 4
Adjust the clock mechanism to the correct time and install the battery.

Step 5
Place the clock on the wall and align them accordingly.

Step 6
Well done! You can start enjoying the wall clock art now!


Step 1
Choose where is your desired placement. Start with a smooth clean and dry surface.

Step 2 - optional
Spray water on surfaces such as wood, plastic, glass, tiles, marble, acrylic. Only apply on mosaic tiles or glossy furniture surface not on the painted wall.

Step 3
Plan where you put the part of the sticker. Peel off from the backing paper.

Step 4
Take out the image from the backing paper. Rub it with a soft cloth or plastic card. Squeeze out the air, using a squeegee or a soft sponge.

Step 5
For easier removal, blow hot air with a hairdryer until you feel the glue melts.


Step 1
Clean the surface. For your tiles application, the surface must be free from dust, dirt, oil or grease.

Step 2 - optional
Spray water on surfaces such as wood, plastic, glass, tiles, marble, acrylic. Only apply on mosaic tiles or glossy furniture surface not on the painted wall.

Step 3
Peel and start applying from any corner. The water will help you adjust the sticker’s position.

Step 4
Stick and Squeeze out the air, using a squeegee or a soft sponge.

Step 5
For easier removal, blow hot air with a hairdryer until you feel the glue melts.


Tools and Preparation
Please do not start without the right tools:
• Folding ruler, pencil and a spirit level – for the line-marking
• A good cutter knife or scissor to cut out the electrical outlets and light switchesCheck below the table with tips about recommended surfaces and areas before installing your 3D Tiles.

Step 1
Clean the surface. For your 3D tiles application, the surface must be free from dust, dirt, oil or grease.

Step 2
Draw a levelled guideline.

Step 3
Cut the tiles using a knife or scissor, removing the excess of the corners.
Tip: If you start from the top right part, cut the indentation and overlap the other tiles on the right side.

Step 4
Remove the plastic protector at the back of the 3D tile. Ensure that the adhesive remains untouched. Keep the transparent film until the end of the application.

Step 5
Apply following your levelled line and slowly peel off the rest of the backing film, pressing it gently. In the end, remove the front transparent protector film.

Step 6
Overlap the grout line in your next 3D tile and press it firmly. Repeat this process until you cover your desired area.

Step 7
For easier removal, blow hot air with a hairdryer until you feel the glue melts.


Preparation
Check the surface and clean the area you will apply your acrylic mirror. It must be free of dusty and greasy.

Step 1
Put the double-sided tape on the back surface of your acrylic mirror.

Step 2
Apply your mirror on the wall pressing it gently.

Step 3
Remove the protective film from the front of your acrylic mirror.

Step 4
If necessary, you can use a clean and dry soft cloth to remove any fingertips or dusty from your new acrylic mirror. For maintenance, you can wipe it with a damp cloth and mild detergent.


Preparation
Check the surface and clean the area you will apply your Cuckoo Clock. Mark the desired place to hang your clock and drill your wall carefully, checking if it doesn’t have any pipe under it.

Step 1
Insert 3 3C batteries for the clock to be fully functional.

Step 2
Place a magnetic bird in the window at the front of the clock and set the time to 7 o’clock.

Step 3
Press ‘RESET’, then ‘ADJUST’ button.

Step 4
Set the correct time.
Well done!
That’s it! Now you can adjust the volume, plug the pendulum to the bottom of the clock and enjoy your new Cuckoo!


Tools and Preparation
Please do not start without the right tools:
• Folding ruler, pencil and a spirit level – for the line-marking
• A good cutter knife or scissor to cut out the excess of the photo.
Step 1
Clean the surface. For your Photo Frame application, the surface must be free from dust, dirt, oil or grease.

Step 2
Measure your photo and cut it to size slightly bigger than the internal frame of your sticker.

Step 3
Put the photo on the sticker frame.
Tip: Start putting your sticker upside down on a table and then position your picture also upside down to attach it into your sticker frame.

Step 4
After, apply your frame with your picture attached on the wall.

Step 5
Pressing it gently, with the help of a cloth or card, remove any bubble.

Preparation
Check the surface and clean the area you will apply your 3D Butterflies. The surface must be free of dust and grease.

Step 1
Fold the wings to 35° to create the 3D effect.

Step 2
Apply the double-sided tape in the middle of the butterflies and peel it off.

Step 3
Position your butterfly on to the wall and press it firmly in the centre so the glue of the tape can adhere to the wall.

Preparation
Clean your wall and decide where you want to hang your Wall Mirror or Wall Clock and mark the point with a pencil. When drilling into walls always check there are no hidden wires or pipes. Make sure that the screws and wall plugs being used are suitable for supporting your unit. Consult a qualified tradesperson if you are unsure.

Attention
• Do not use wire or string to hang this mirror.
• We recommend two people to install heavy or large clocks.
• We recommend checking the mirror periodically to see that no fittings or fixings have loosened or require attention.
• Do not strike the mirror glass with hard pointed objects.
• If the glass is chipped or broken do not use and dispose of safely.
• Do not place hot or cold items against the glass.

Step 1
Drill your wall and apply the suitable fixings. If your Wall Mirror and Clock is heavy, we recommend asking for help to another person.Tip: Ensure you check that the wall and wall fittings are appropriate. Some models weigh up to 8kg.
Step 2
Position your Wall Mirror or Clock and, if necessary, clean with a damp cloth to enhance the reflectiveness.

Hints
1) General rule – Always use a larger screw and wall plug if you are not sure.2) Ensure you use the recommended drill bit to match the wall plug and hole size.3) Ensure you drill the hole horizontally, do not force the drill or enlarge the hole.4) Take extra care when drilling high walls, ceilings and ceramic tiles. Ensure the plug is fitting below the ceramic tittle to avoid splitting or cracking.
5) Ensure wall plugs are well fitted and are a tight fit in the drilled hole.
Tools
Please do not start without the right tools:
• Folding ruler, pencil and a spirit level – for the line-marking
• Spatula and priming material for the surface (the wall)
• A sharp pair of scissors for tailoring the photo mural
• A wide paintbrush to spread the paste
• A foam roller to press the mural on the wall
• A good cutter knife to cut out the electrical outlets and light switches
Preparation
The photo mural paper is relatively strong, but it cannot do wonders at the bridging of unevenness. So, in the end, the finished photo mural is just as good as the surface, and therefore you have to prepare it as good as possible. We recommend the removing of woodchip wallpapers – it works really easy with a wallpaper remover. Holes have to get filled; latex- and oil paints should be whetted. After the preparation, the perfect surface is even and uses absorbent to soak up the paste and warrant a good drying.

Step 1
Even if the space is sometimes rare – you should always spread the fitting parts next to each other over the floor. In rare cases, a significant difference of the colours may appear (that sometimes happens at the mural producing) – then you can reclaim the mural, but only if it wasn’t cut and processed with paste. Please contact us immediately. It is in actual fact impossible that the size is differing. If two parts don’t fit dimensionally, then something didn’t work at plastering or soaking.

Step 2
We deliver the paste with the most photo murals. The mixing ratio of paste and water is specified on the packing or the supplied manual. One last tip on budging: the best tool is a mixer – no clumps of paste. But don’t forget to clean it carefully.

Step 3
The following sizes are possible for murals:
• 8 parts
• 6 parts
• 4 parts
• 4 parts – athwart
• 2 parts (door posters can also adhere on the wall)
• 1 partThe situation for the 1-parted, 2-parted, 4-parted and 6-parted murals is obvious – you can put the parts arbitrary on the wall, so we explain the procedure for the 8-parted wallpapers. After recording the mural’s exact position, you draw a horizontal and vertical line in the middle of each side of the wall with the spirit level and the pencil. As a profile, you have to turn around the spirit level and look if the bubble is even for both directories – if not, you have to replace old spirit level.

Step 4
You paste the backside of the first part evenly but not too thick – the first part of the 8-parted murals is part no. 4. Please also paste the edges very particularly.
Important: The pasted element is not permitted to soak. After circa one minute it has to get pressed on the wall. Otherwise, the size would change and the other parts don’t fit correctly. If you hire a painter, please show these tips to him before the beginning of the work.
Step 5
You begin with part no. 4 (sub-row, the second part from left) as we mentioned before.
Benefit: You avoid problems with non-rectangular walls, and small mistakes don’t sum up so much. You adjust the element on the drawn lines and even it with the foam roller. We work outwards from the middle, the air under the mural leaks on the sides. The odd paste gets dabbed carefully with smooth clout.
Warning: Our machining manual refers to the numbering of the elements, as indicated in the image below. Some photo wallpapers have a different numbering, for example, 1-4 in the upper and 5-8 in the inferior row.
Step 6
The next element which gets to put on the wall is part no. 3. The mural gets slightly shorter when it dries, so you have to overlap the parts for circa 2 mm. Smaller air bubbles disappear when the mural gets dry.

Step 7
You proceed with the elements no. 6, 2 and 8 from sub-row. After this, the upper row follows with the parts no. 5, 1 and 7. The best temperature for the drying is circa 20°C. As always at wallpapering works you have to mind that no draught appears – even the air gets a little bit thick, the window stays closed. If supernatant edges appear, you cut them on the next day- the perfect wall cover is finished.
Tools
Please do not start without the right tools:
• Folding ruler, pencil and a spirit level – for the line-marking
• Spatula and priming material for the surface (the wall)
• A sharp pair of scissors for tailoring the door mural
• A wide paintbrush to spread the paste
• A foam roller to press the mural on the wall
• A good cutter knife to cut out the electrical outlets and light switches
Preparation
At first, prepare your door. It should be clean, free of unevenness. The photo mural paper is relatively strong, but it cannot do wonders at the bridging of unevenness. So, in the end, the finished photo mural is just as good as the surface, and therefore you have to prepare it as good as possible. After the preparation, the perfect surface is even and uses absorbent to soak up the paste and warrant a good drying.

Step 1
We deliver the paste with the most photo murals. The mixing ratio of paste and water is specified on the packing or the supplied manual. One last tip on budging: the best tool is a mixer – no clumps of paste. But don’t forget to clean it carefully.
Step 2
We deliver the paste with the most photo murals. The mixing ratio of paste and water is specified on the packing or the supplied manual. One last tip on budging: the best tool is a mixer – no clumps of paste. But don’t forget to clean it carefully.

Step 3
You paste the backside of the first part evenly but not too thick – the first part of the 8-parted murals is part no. 4. Please also paste the edges very particularly.
Important: The pasted element is not permitted to soak. After circa one minute it has to get pressed on the wall. Otherwise, the size would change, and the other parts won’t fit correctly. If you hire a painter, please show these tips to him before the beginning of the work.
Step 4
Now you can mount the pieces of photo mural from top to bottom and flatten each piece from the upper to the lower side while pressing out the air between photo mural and your door to the sides. The following sizes are possible for door murals: 2 parts & 3 parts

Step 5
Cut the door mural on the position of the door handle and mantle it. We recommend to work at room temperature and try to avoid any drafts from open windows. The drying process must happen slowly. When the door mural is dry, you have the possibility to cut out the overlaying edges with a cutter.